Showing posts with label 2d. Show all posts

Thursday, October 24, 2013

Spooky Halloween Trees: Art for Primary Children


Here is a quick halloween activity
 for primary students.


Firstly, grab some A3 paper in white or yellow. 
Blue could work nicely too.
Find a circular object and trace around it to make the moon.

We discussed that a centred moon
 does not make a terribly interesting composition.
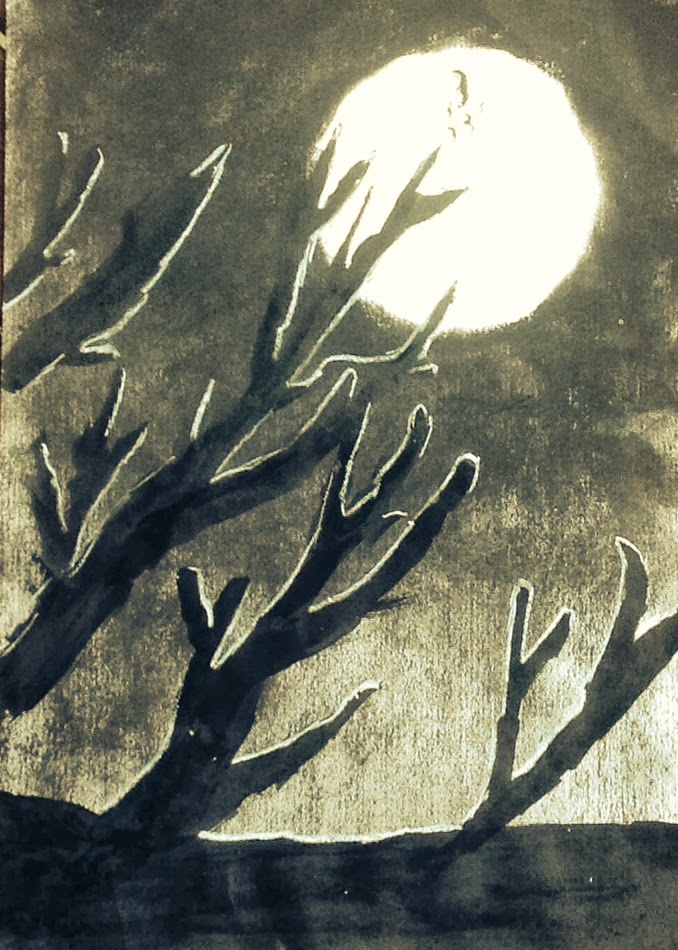


Now for the fun... charcoal experimentation!
Students were challenged to try using their charcoal sticks
from all angles and create all manner of marks.
This gets a lot of their system as well as being fruitful.

Then I demonstrated how to create variety of tone
 by varying the pressure, using smudging etc. 
They filled in the background, except the moon.

Ink time!
Brushes, nibs, sticks.
More experimentation time.
When it was time to move on,
they used ink to create a tree.

Trees always look easy peasy,
 but actually can be quite challenging for some.
Its important to discuss overlapping,
and the change in the thickness as the tree branches out.


 Many students just put the tree to one side,
 but I like the way this student is playing with position and composition.


Finally, an introduction into light sources.

Turning the fluros on and off in the classroom
and noting how it changes the light on our faces and the objects around us.

We noted that in our spooky pictures

the moon was our light source.
We used a waxy white pencil and simple lines to highlight the branches and trunk of the tree.


A simple line on the underside or top side of the branch
 was all that was required to make the trees extra spooky.


What else?

Add a eerie bird. 
Take a photo of the image and play with filters.
Create a new foreground.
Or, simply put it up for halloween!


Boo everybody!


Wednesday, June 19, 2013

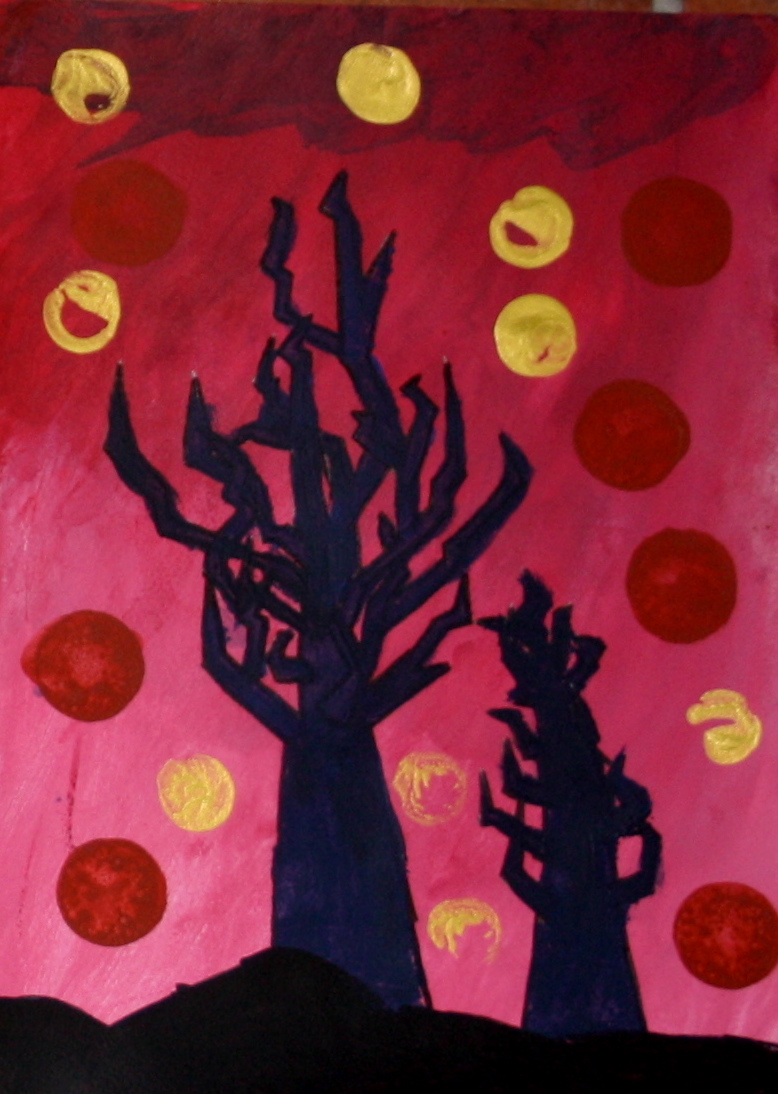
Trees, dots and colour blending :TR Mack style Yr 5 Primary art

My year 5 boys have just completed a painting unit based, 
inspired by the work of TR Mack.

There are a number of art education ideas
 floating around the internet,
 regarding this artist.
 One I particularly admire 
 so check it out too.


I have taken a slightly different approach with my Yr 5 boys.
We began with some colour wheel theory and vocabulary (building the foundations).
Eventually we turned our focus
 to monochromatic colour schemes.

The boys were set the task
 of painting a monochromatic background.
We discussed choices they could make such as blending,
or using a more textured cross hatching approach.

Monochromatic Background using a textured approach

The next step was to look at the work of TR Mack
 and deconstruct his approach to tree scapes.
The boys practiced drawing trees...
 splitting branches again and again.
We discussed styles; swirly, angular, sparse, spooky etc.
(incidentally there are real science and Maths links
 possible here, as my husband pointed out).

Fill in the trees in a solid colour such as black or navy

Before the boys were ready to draw
 up their tree(s) on their background,
we recapped some compositional concepts
 that we had covered in a previous unit.

Points such as:
  •  avoid placement in the centre,
  •  anchoring the image by connecting to the edges,
  • variety of size if there is more than one tree etc. 

Add a ground if you wish

Finally, we printed dots,
 and dots on dots,
 and dots on dots on dots. 
We used old corks, cotton buds,


 industrial offcuts, anything circular will do. 

Testing colours and objects for printing.

Spacing is important here,
and we discussed clusters,
 regular spacing, irregular spacing
 and the pros and cons of all possibilities.


These examples are only a handful of the class,
as they were all successful.
I love how each tree has its own story.


Saturday, August 11, 2012

Intagraming jammin'


I've been doing it in private for sometime.


But recently I decided to take it public.

Instragraming jammin'


I may have a documenting dependancy!


 Where am I going?
What am I doing?
What was that?


I may never know the answers
 but I am savouring the visual sensations along the way.

So, if you are on the instagram road,
 look me up:
elleandlou


Tuesday, November 15, 2011

Stencilling and mixed Media

I'm not really sure if work days get any better than last Friday!

Once again, I had the good fortune to attend a workshop
 by Chris Stuart (Fine Artz Studio) focussing on Mixed Media.

Chris showed us many tricks of the trade with transfer techniques. 
All of which were wonderfully adaptable in the classroom and my own work!
But the highlight of the day was the insight I gained into the potential of stencil work.


Can't claim fame to this one unfortunately- this is by the lovely Lucy...
..and this is just part of the work.


We began the whole process by playing around with different stencils
 from a variety of places and we even cut some of our own from a product called ezi-cut.


As you can see we are reminded about the positive and negative,
 and the mirror image of a stencil to provide variation with repetition.


Chris gave us a sheet of watercolour paper which she had prepared with inks.
I really like this starting point because to me,
 there is nothing more distracting than a white surface.


 Lucy strikes again-look at the pattern in the black bird!


We applied our stencils with gesso: layering, using sponges, using rollers .
Then, we applied inks for colours.


We repeated this process over and over..
 blocking out areas... 
creating new areas...
adding & subtracting...
layer upon layer upon layer.

Can't claim fame this one either, unfortunately-this is by Marvelous Marcus!

Now... I'm no Banksy...


..but this process is totally addictive....
 and cathartic...
I really get it!


And if that isn't enough, when you are finished doing all of that stencilling,
you can work over it with pastels, or pens, or crayons...
pick your creative weapon of choice.

This one is mine. 


Tomorrow it is Friday once more...
 and so it's time for a wine whine...


Awww, I wish I was going to another Fine Artz workshop!


Thanks Chris.


Linking up this Elle and Lou post with:


Friday, July 29, 2011

Duality in Art and Life : city vs forest


I love the city.
I love the architecture.
 Its just BIG functional art.
 When I catch the bus to work, I travel past all the city's eclectic mix of structures...


I love maps.
I love their aesthetic quality. 
They remind me that we are like little ants going down many different pathways.


I love the forest.
I love the multitudes of trees, with branches that overlap and intertwine...


and roots that become part of the earth.


I love to be.
I love to be in these places,
 that are so different, and yet so connected.


So I've been working on a diptych of dichotomy.
 The dual of people vs planet.
What are side are we barracking for I wonder?

The forest or...
the city.


It is International Year of the Forest - lets take care of them
.... invest in them and we invest in us!


Sunday, June 12, 2011

Text & Transfer Tutorial

I've been thinking about the the food chain
(actually I've mainly just been thinking about food) 


My artworks have been created through a wax transfer method, (which I'll talk about below) and reuses original pages from a great 1980's book "1500 Fascinating Facts about the Universe the World and its People".


I have displayed the two works together in the bathroom as I like the quirky intestinal connection between the images and the privy. Too much information?


The Other Information...how I did it:


First, iron some wax shavings onto some paper- I upcycled a page from a book and I do declare that text works well in this exercise.
Hints:

  • Be sure to use a low heat as wax can ignite (yep, there is a danger factor and all good artists don't need to suffer for their work.
  • Don't use your normal iron, preferably choose one without steam holes that is used specifically for this purpose.
  • Also protect your ironing board!

Then, choose an image that you want to transfer on top. I chose scientific images as it suits my current obsession. On the back of the image cover with charcoal. 


Next, flip the image (charcoal down) onto the wax encrusted paper. Trace over it with a pen, checking the pressure is transferring well.


Finally, use your iron on a low heat to melt the wax slightly. It will then dry, sealing in the wax transferred image.


Another wax transfer example- click to link


Feel free to ask any questions if you are unsure about anything.
Thanks to Chris Stewart from Fine Artzs Studio for introducing me to the technique.


Linking Elle and Lou with:
Release Me Create

Friday, June 3, 2011

International Year of the Forest- Art Tutorial

Forests are magical places..ask any child. Adults feel it too! Haven't you?


It's not just that we grow up with the fables and legends, so many of which are located in forests, it's so much more that that; it's everything from the floor to the canopy - the animals, the fungi, the noises. They are spiritual places.


In Australia we have the rainforests on the coast & the old growth forests of Tasmania, small parts of which are still largely untouched and pristine. But we also have the dry open forests with gums and wattle or the forests of wallum that dot the sand dunes. So many of these areas are still under threat by development, all in the name of ticky-tacky suburbs and highrises. 

For those in America, England, Europe and Asia the concept of forest is different again. All unique, all beautiful. Please share...

International Year of the Forest is a time to celebrate and hopefully educate - these artworks  convey some glimpses into a child's concept of forest. These are by 9 and 10 year old boys who were so excited by the topic that the room was all abuzz with a positive energy.


The results were everything from scary.....


....to sparse (loving that sugar glider!)


.....to flourishing and healthy


...to devastated yet hopeful.


... to dynamic, totemic, scary eyed and more.....


What to hunt and gather:
Coloured paper, glue, black and white pencil and tracing paper.


What to do:
Tear the paper in long strips and play around with creating tree shapes. We used 2 or 3 colours to layer the trees and we discussed creating different levels and looking at the negative spaces.


Next:
Add some more detail such as animals and leaves.


Now the final layer:
Tear some tracing paper into a tree shape or leaves or animals..whatever...
Using a white and black pencil add detail and highlights. I show the a slideshow of detailed forest images to stimulate ideas and provide some extra visual knowledge to draw from.


Wow! I just love all the different interpretations of FOREST.
In so many ways this was a learning experience for everyone.