Showing posts with label Kids Art. Show all posts

Thursday, October 24, 2013

Spooky Halloween Trees: Art for Primary Children


Here is a quick halloween activity
 for primary students.


Firstly, grab some A3 paper in white or yellow. 
Blue could work nicely too.
Find a circular object and trace around it to make the moon.

We discussed that a centred moon
 does not make a terribly interesting composition.
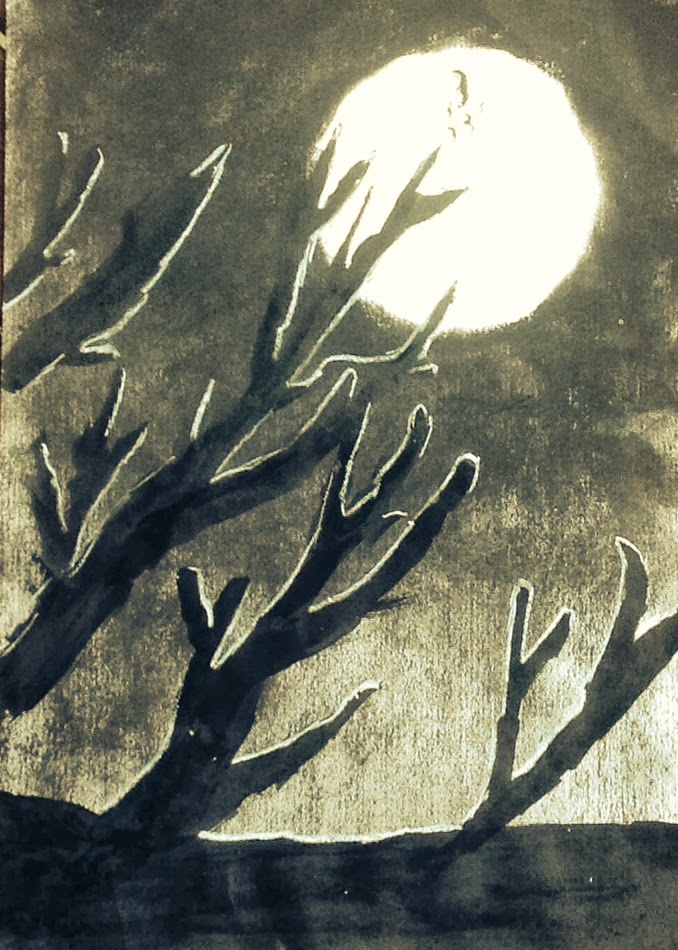


Now for the fun... charcoal experimentation!
Students were challenged to try using their charcoal sticks
from all angles and create all manner of marks.
This gets a lot of their system as well as being fruitful.

Then I demonstrated how to create variety of tone
 by varying the pressure, using smudging etc. 
They filled in the background, except the moon.

Ink time!
Brushes, nibs, sticks.
More experimentation time.
When it was time to move on,
they used ink to create a tree.

Trees always look easy peasy,
 but actually can be quite challenging for some.
Its important to discuss overlapping,
and the change in the thickness as the tree branches out.


 Many students just put the tree to one side,
 but I like the way this student is playing with position and composition.


Finally, an introduction into light sources.

Turning the fluros on and off in the classroom
and noting how it changes the light on our faces and the objects around us.

We noted that in our spooky pictures

the moon was our light source.
We used a waxy white pencil and simple lines to highlight the branches and trunk of the tree.


A simple line on the underside or top side of the branch
 was all that was required to make the trees extra spooky.


What else?

Add a eerie bird. 
Take a photo of the image and play with filters.
Create a new foreground.
Or, simply put it up for halloween!


Boo everybody!


Sunday, September 23, 2012

ipad drawing lesson for students and adults

The Background:
 ipad drawing apps are plentiful.
They interest me for both my personal work and my high school teaching.
This is what I have been doing and am now teaching to my Yr 8 classes.

I use Sketch Book Express with the students- but Sketch Book Pro is worth the $1.


To Begin:
It is pretty simple to begin with a line drawing like Twiggy.
In the first lesson or two I get the students to use a specific pencil (no 4) 
and then they practice brush shortcuts.
"Just play with variation of thickness and opacity".


App + App = image development:
Filter Apps like Instagram, Camera Bag and my favourite BeFunky allow students to manipulate their saved image. Through these simple apps they make visual choices regarding cropping, saturation, frames, filters and more.
The students now have two images and are building up a portfolio.


A Step Further - Using screen shots and Layers:
Once you have a basic line drawing - you can add a layer.
Here I simply took a screen shot of a 1960s fabric and imported the photo as a new layer.

I erased parts of the fabric layer so that my 1960s woman was visible underneath.

A Third Layer- Colour:
SB Express is limited to 3 layers- SB Pro has 5 layers- much better!
So now with the hair I have added a third layer on the bottom for my colour.
 Having the drawing layer, the screen shot layer and colour layer separate is really important.
 When teaching this to a class, the students need to be aware all the time WHICH layer they are working on.
 The benefit of adding colour onto a separate layer?
Students can delete the layer if it isn't working.


So here we are - almost finished.
Once again, export the image to the photo library
 and extend the image by employing filter apps to manipulate the image. 
When teaching this is a great opportunity to have discussions
 about what is successful and why?


In the classroom- some points:
  • Get the students to 'save a copy' regularly during the process as Sketch Book doesn't have this feature in built. 
  • For younger classes and classes lacking confidence begin with a screen shot of an image and trace over the image on a second layer. One class I am working with began with screen shots and photos of a still life. Then they traced over these images - this engages all students extremely well, they don't fail and their confidence improves- BAM!


This is all pretty new to me and I am learning still.
What I do know is that ipads and tablets are now part of education
and the way I see it they are extremely applicable in Art.
 I love the potential, it is exciting don't you think?

It is also an addictive introduction for students into the power of digital apps and the further potential of more powerful software such as Adobe Photoshop and Illustrator.

I am so interested to hear what anyone else is doing in this area.
Do you have a favourite drawing app?
What is your favourite filter app?

My user name on Instagram is elleandlou

Tuesday, July 3, 2012

How to make a Robot Mask

How to Make a Robot Mask Tutorial

Art teachers are always being asked to just "whip up" something for someone.

It could be to screen print t-shirts for the cross country team,
make a gigantic fly for a sketch on assembly (true story)
or in this case 12 robot masks for a drama competition.

So even though it is school holidays,
this is what I've been up to.


Begin with a generic paper mask like this one.
They cost about $1 (or less) from art stores.


Grab a pencil and mark out your areas as below.


Get a kraft knife and cut out the eyes
(be careful, your goal is
 to retain your own eyesight and all of your fingers).


With silver acrylic paint,
brush on the eyes, center head and sides of the cheeks.


Mix silver and blue paint together to paint the other areas.


Use black paint and a smaller brush
 to define the feature areas.


Use a cotton bud to dot on 'rivits'


I used off-cut stickers from Reverse Garbage
to create the central detail on the forehead or you could paint something similar.


Too easy- look and it doesn't have to be perfect.


And you could add more, or less as you desire/require.


Metropolis x 12 and now...
to tackle the astronaut helmets.


Sharing this Elle and Lou Post at
Bloom designs
My Creative Space

Sunday, May 13, 2012

Art bangles: A class project for Primary Students

Now it may just be me..
but in my experience,
 the male gender aren't crash hot
 when it comes to buying presents for others.


This week I have been talking
 with quite a few mums
 about what goes on in their home for Mother's day.


Overwhelmingly, this is what happens:
It seems we mums buy our own presents,
subtly side passing them to our partners 
who in turn pass them on to the kids.

This has its benefits-we get what we want!
I know, because I'm getting a funky pair of knee high boots  (Oh! what a surprise!)

But really we mums have don't care about the present,
 it is the thought that counts.
 We are SO cliche sometimes!


Now I teach in a boys' college and I feel I am obliged to TRY and educate the young ones to think about others, especially their mums who do so much for them.

I admit,
 I also wanted to teach them about up-cycling,
artworks from a variety or historical and cultural contexts,
moulding materials and presentation.


So, we embarked on 62 bangles!
This how we did it...


  •   We began by soaking extra large paddle pop sticks in water for 24 hours.
  • Then carefully, we bent the pop sticks into a curve and put them in a small glass to dry for 24 hours. Some broke or splintered, but we had extras.


  • Next, the boys looked through old Art books and journals that were destined for the recycle bin. As they looked at the artworks spontaneous conversations, questions and analysis evolved. They chose an artwork that would become the feature of the gift tag and bangle.


  • A flat paddle pop stick was used as a template. Placing it onto the chosen artwork, they traced around the shape, cut out the art image and Mod Podged it onto the bangle. They sealed the outside of the bangle with Mod Podge also. 


  • To make the gift tag the boys used a circle punch to select a matching image. This was then glued on blue industrial offcuts. 
  • They punched white paper for the reverse side, glued it and wrote a sweet message for their mum.
  • Then the boys punched a small hole and inserted the string. 


  •  Finally the boys wrapped the bangle, inserting the information note below.


I know the boys' mothers will appreciate the care their sons have taken in creating this gift for them and the boys were very proud of what they achieved.

Incidentally, this activity also gave the boys practice with their fine motor skills such as cutting, tracing and accuracy. Never underestimate how many primary students struggle with these simple tasks!

Anyhoot- Happy Mothers Day!

Post Note: my children made me some gorgeous Mother's  Day cards, as did my wonderful husband AND my knee high boots are a perfect fit...who would have thunk it ;)


Also, the original pop bangle idea is not mine it came from the creative  Tara at Craft Affection.


Sharing this Elle and Lou post here:
http://www.kadie-sevenalive.blogspot.com.au/
http://www.iheartnaptime.net/
http://cheapcraftymama.com/pin-it-and-win-it-7/#comment-1199
http://www.releasemecreate.blogspot.com.au/
http://www.happygoluckyblog.com/
http://romantichome.blogspot.com.au/
http://chiconashoestringdecorating.blogspot.com.au/
http://www.craftionary.net/


Sunday, February 5, 2012

Children's Gift Tags: Retro and laminate up-cycling

The new school year is only a few weeks old here in Australia.
Already, the weekends are filling up with class parties for my children's friends.

Presents to buy.
Presents to  wrap.
Presents to decorate.
Presents that need gift tags!


Lets face it- kids aren't really interested in cards.
They are usually just tossed to one side.
But a gift tag on the other hand....


A child will turn over a tag over, searching for THEIR name on it.


They love bright colours.


And these retro images will still captivate this new generation.

This new generation will also reap other benefits,
 because these gift tags are up-cycledeco-friendly!

They began their life as laminate sample discards-destined for landfill.


That is until I got my scissors and hole punch to them.


With paper on the back to write a short message on and a ribbon, they begin to take shape.


Naturally, the sweet images are also up-cycled from an old kids book.


I am officially gift tag ready!
http://debbie-debbiedoos.blogspot.com.au/